If you need to capture what’s on your screen, the easiest option is to take a screenshot. A screenshot can help you save an important text message, an e-receipt, share a message with someone, or remember information you’ve found.
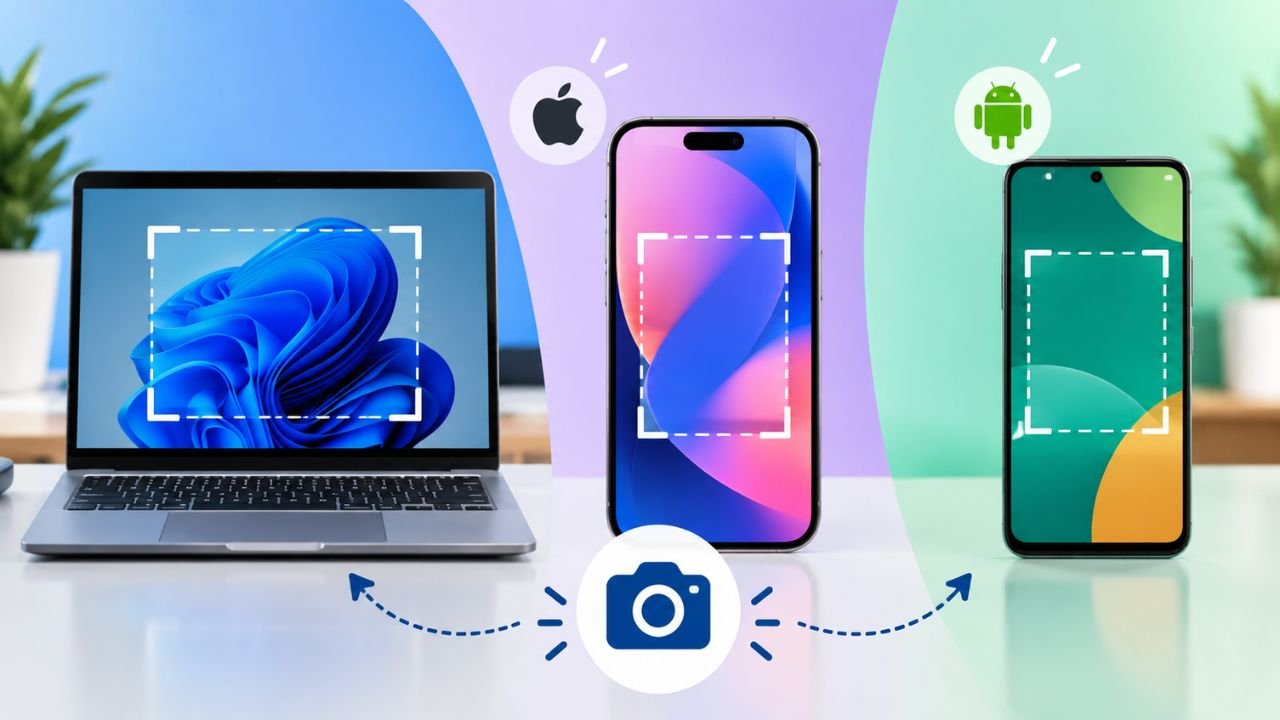
There are many different ways to take screenshots depending on the type of device you are using. On a Windows PC, you need to either use a keyboard shortcut or the Snipping Tool. On the Mac, keyboard shortcuts make it even simpler. For both iPhone and Android, different combinations of buttons are often needed to take a screenshot.
This article provides instructions on how to take a screenshot for the most common devices as well as where to locate screenshots, edit, or share them.
Table of Contents
How to Take a Screenshot on Windows
There are many ways to take a screenshot on Windows systems relatively easily.
Use the Print Screen Key
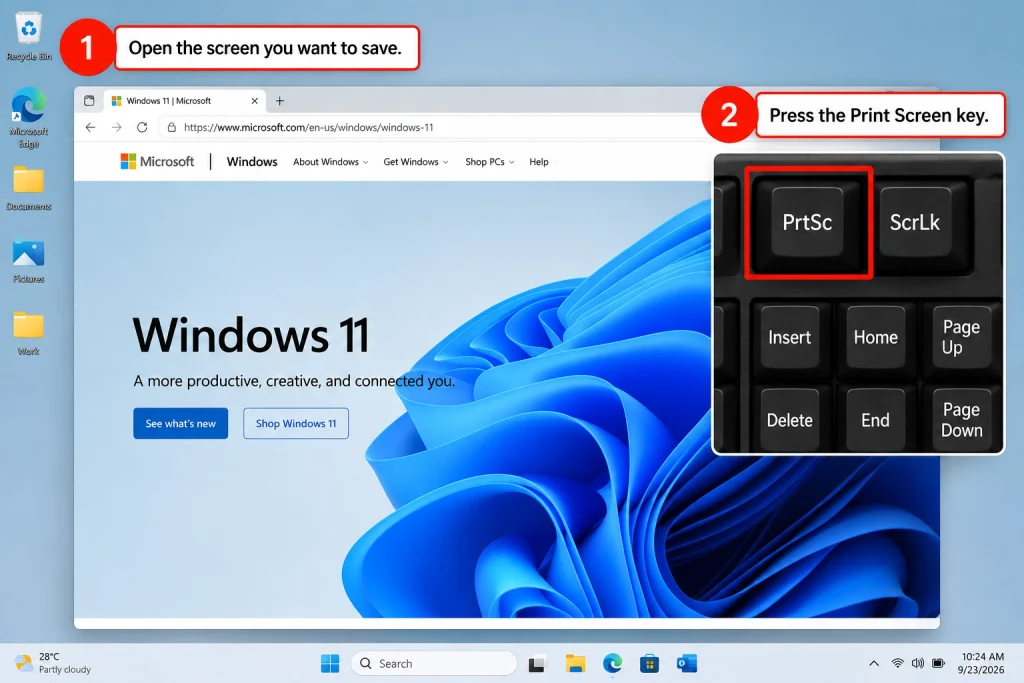
You can find the Print Screen key labeled PrtSc, PrtScn, or Print Screen on many Windows keyboards.
To take a screenshot of your whole screen:
Go to the window you want to take a screenshot of.
Press the Print Screen key.
The screenshot will be saved to your clipboard.
Open Paint, Word, or some other image editing software.
Press Ctrl + V to paste it.
Save the file.
This is a simple way to take a screenshot, which you can then paste into an application.
Use Windows + Print Screen
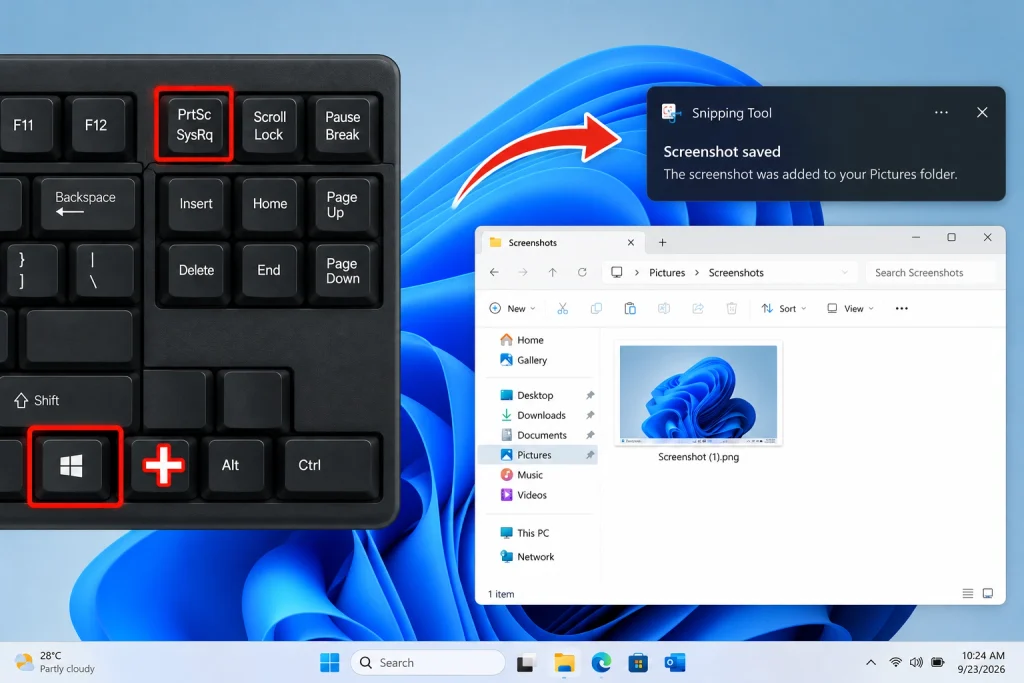
Windows also has a way to save your screenshot automatically. To do this, use this key combination.
Press:
Windows key + Print Screen.
Your display will flash for a moment when the screenshot is captured. The image will be saved automatically.
Typically, you can find in:
Pictures > Screenshots.
This process is one of the simplest since it does not require you to paste the image into an application.
Use the Snipping Tool
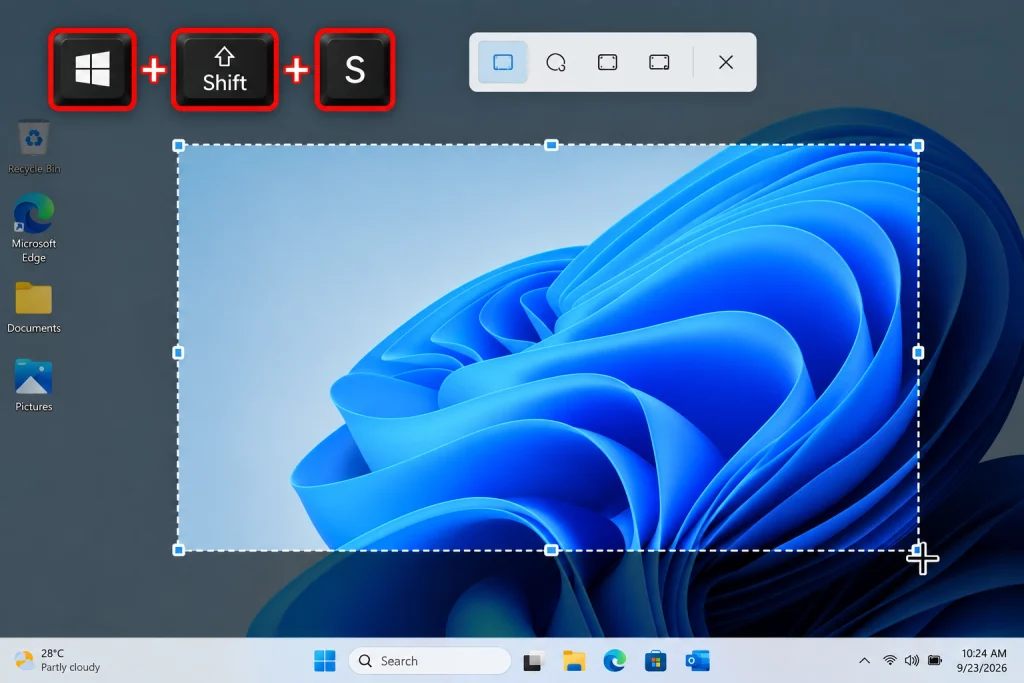
With the Snipping Tool, you can control what you want to capture. Rather than capturing everything on the screen, you can highlight one area only.
To use it:
Press Windows + Shift + S.
Your monitor goes slightly dim.
Choose the area you would like to capture.
Relinquish the mouse button.
Windows would record the selected area.
Click on the notification that appears afterward to access the screenshot.
Either edit or save the picture.
There are several options in the Snipping Tool. Depending on the version of Windows you possess, you will have to capture in either rectangular, free-form, window mode, or full-screen mode.
How to Take a Screenshot on a Mac
Mac have built-in screenshot features; you do not need to install another application for normal screenshots.
Capture the Entire Screen
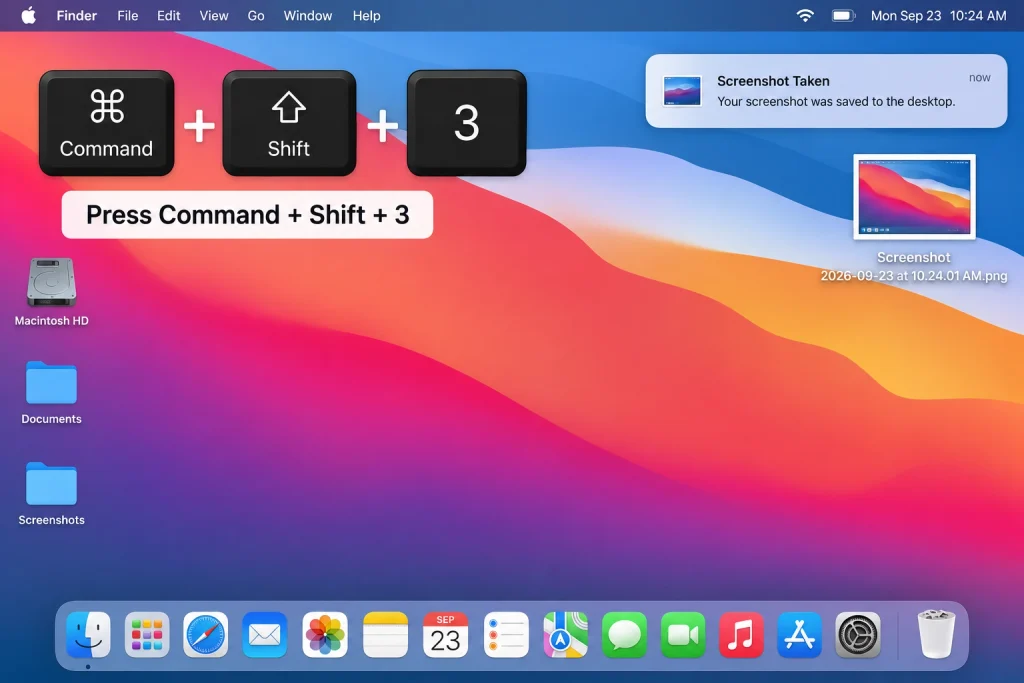
Press:
Command + Shift + 3
Your Mac will take a screenshot of the entire screen. By default, the screenshot is saved to the desktop.
This method is useful if you want to keep everything visible on the screen.
Capture Part of the Screen
Sometimes you only want a small part of your screen.
To do this, hold down:
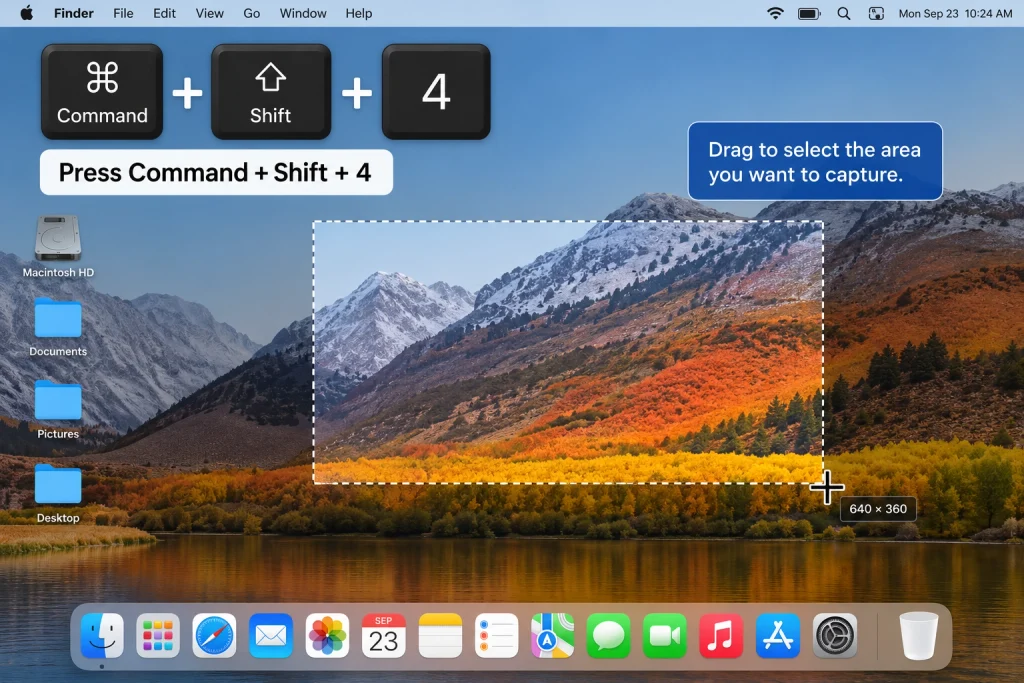
Command + Shift + 4
This will bring up the selection tool.
Now, click and drag over the part you want to take a picture of and let go.
This way, you will avoid saving unwanted stuff.
Open the Screenshot Menu
In addition, you can use the following:
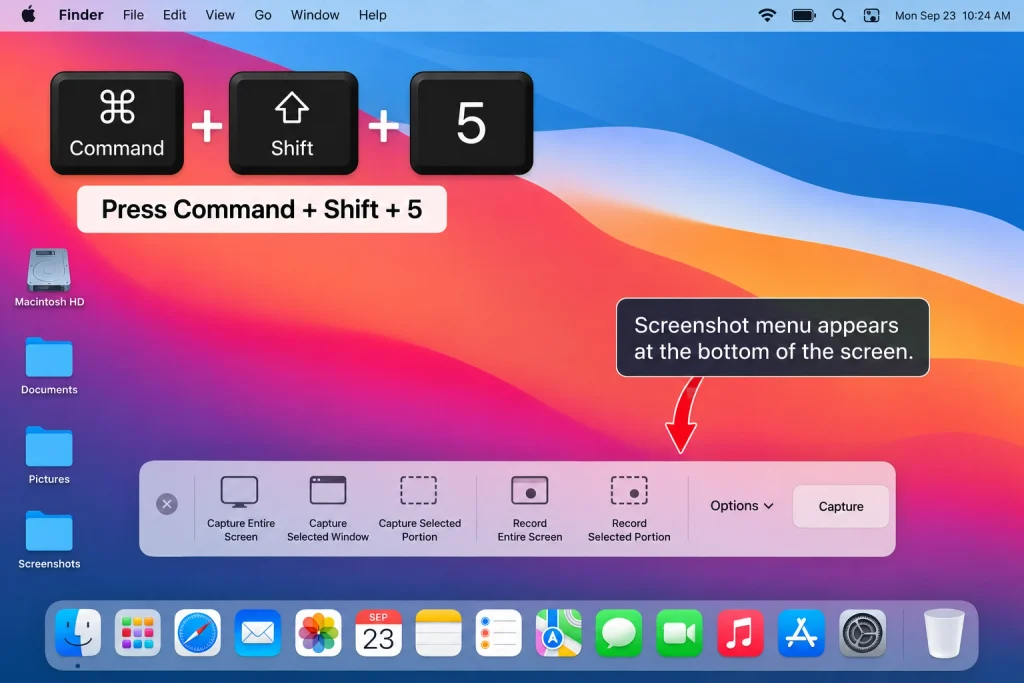
Command + Shift + 5
When you press this key combination, the screenshot menu will come up on the bottom portion of the screen, and you will be able to select to take a screen shot of the entire screen, a certain window, or a selected area.
This option can also be used for screen recording options; thus, it is beneficial when the regular screenshot option is not sufficient.
How to Take a Screenshot on an iPhone
It is simple to make a screenshot on an iPhone.
But the number of buttons that you need to press on the iPhone varies with different iPhone models.
iPhones with Face ID
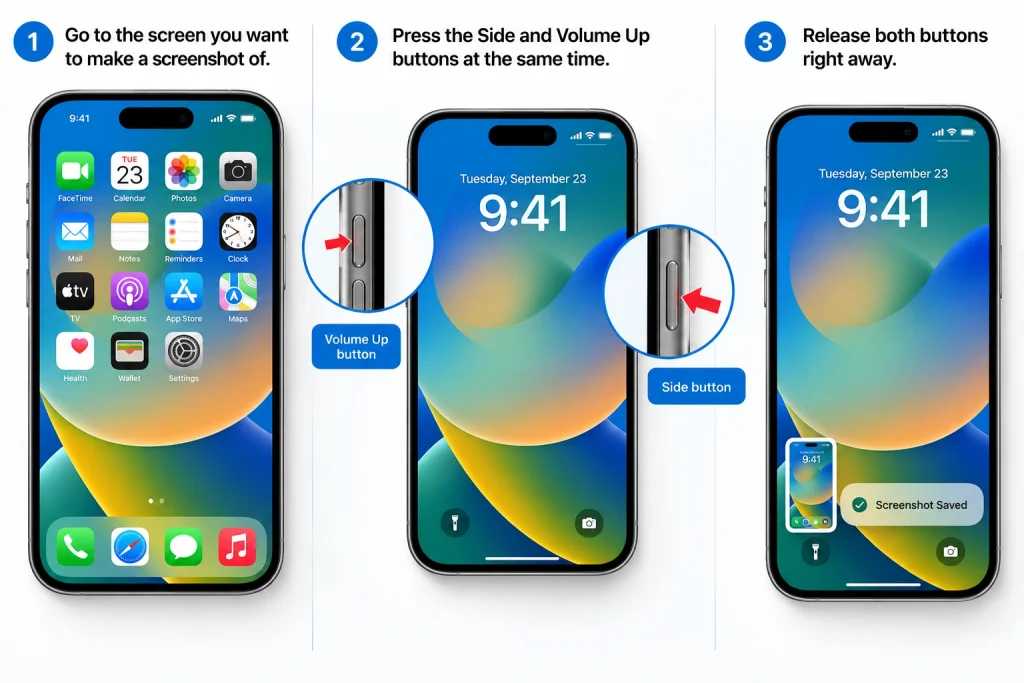
For iPhones that do not have a Home button:
Go to the screen you want to make a screenshot of.
Press the Side and Volume Up buttons at the same time.
Release both buttons right away.
You will see a small preview on the left-bottom corner.
If you want to edit the image, tap on the preview.
If you do not tap the preview, it will disappear after a short time.
iPhones with a Home Button
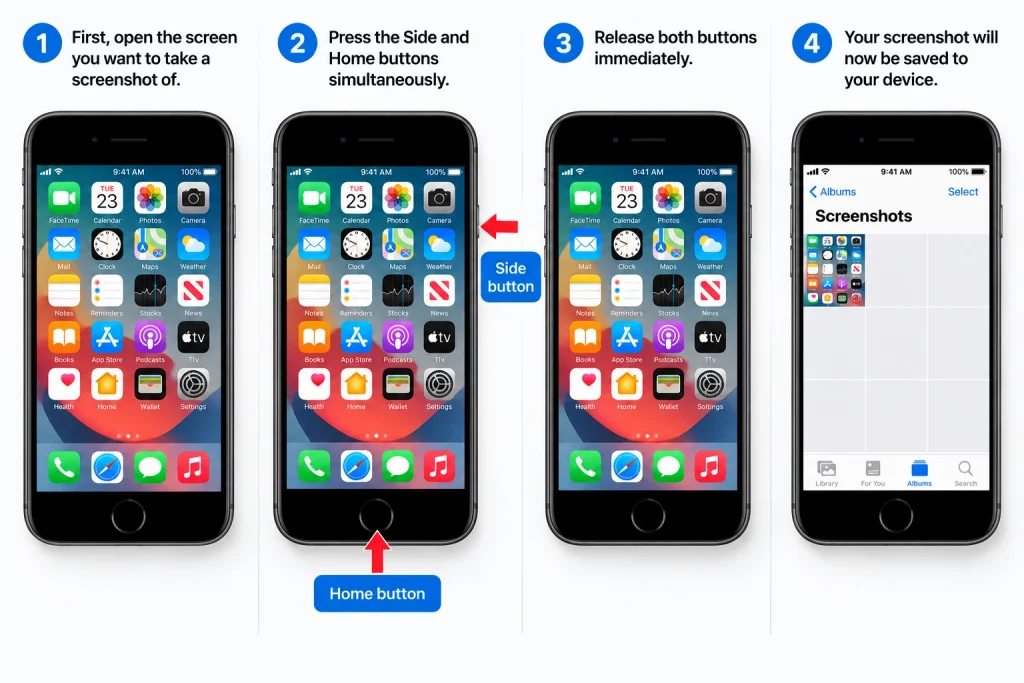
On most old model iPhones featuring a Home button:
First, open the screen you want to take a screenshot of.
Press the Side and Home buttons simultaneously.
Release both buttons immediately.
Your screenshot will now be saved to your device.
You can find your screenshot in the Photos app.
Where iPhone Screenshots Are Saved
Your screenshots are normally stored in the Photos app.
Open:
Photos > Albums > Screenshots
From there, you can crop, mark, share, or delete the image.
How to Take a Screenshot on Android
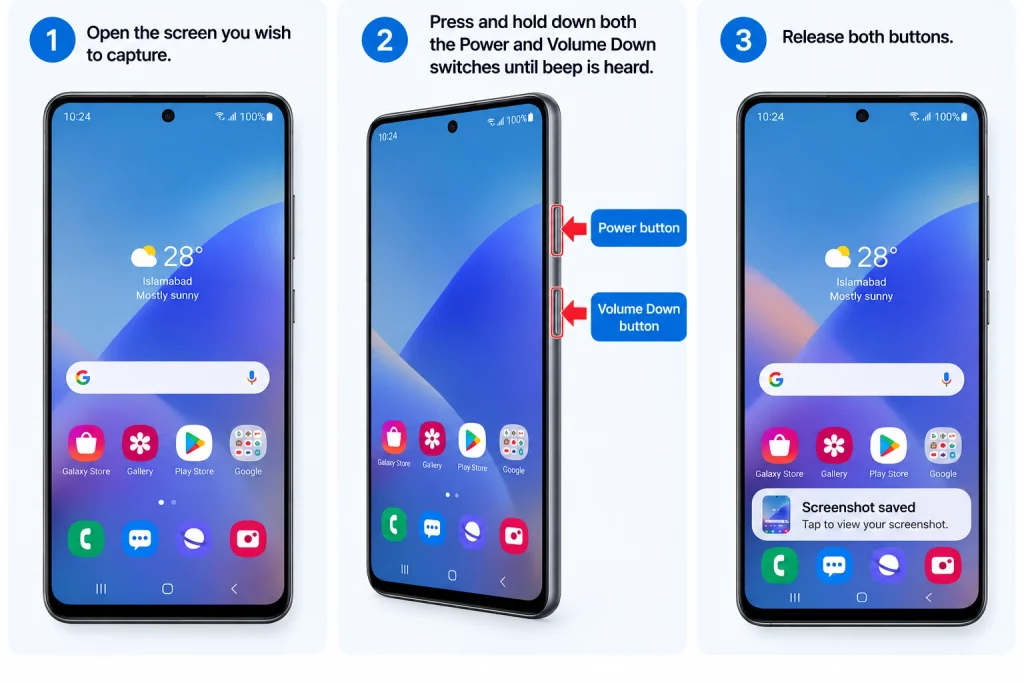
There are different button combinations for different kinds of Android phones, depending on the manufacturer. The most common way of taking screenshots is simple.
Use the Power and Volume Buttons
On many Android phones:
Open the screen you wish to capture.
Press and hold down both the Power and Volume Down switches until beep is heard.
Release both buttons.
You may see some previews or toolbars to work with.
Then you can edit or share your screenshot.
Use the Quick Settings Panel
Some Android mobile devices have the provision to take screenshots via the Quick Settings option.
Simply pull down the Quick Settings feature from your phone’s top display. There you will see the Screenshot option.
With that, you can take a screenshot with minimal discomfort when pressing the buttons.
Samsung Mobile Phones
Some of the Samsung variety of mobile phones deploy the Power + Volume Down feature as the screenshot-taking option. Certain mobile phones also provide different methods for performing screenshots.
How to Edit a Screenshot
After taking a screenshot you might want to delete some parts of the screen capture.
Many devices have a built-in editor that allows you to make these changes.
Some of the features that may be available to you include:
Trimming
Drawing over the screenshot
Adding text
Highlighting
Adding arrows or shapes
Blurring information
For instance, if you want to send a screenshot of a problem you may have encountered on your system, you can use the editor feature to mark the error on the screen capture before sending it.
You can access some editing features through the Snipping Tool on a Windows system. On both an iPhone and Android, you should find editing features available immediately after a screenshot has been taken.
To Summarize
Capturing the screen on almost any modern device is simple. On Windows computers, you can do so by pressing “Print Screen” “Windows+ Print Screen” and/or using the Snipping Tool. For Mac computers, the combination of Command + Shift keys helps one capture screens effortlessly.
On iPhones, you can use the Side and Volume up button or on other models, use the Side and Home buttons depending on the model you have. For Android phones, you can use Power + Volume Down keys to take a screenshot.
Now that you know how to easily take screenshots, it only takes seconds for you to capture your screen and then you can choose to edit, save or share it with others.
HowFixer is your trusted source for tech solutions. We provide easy "how-to" guides for gadgets, tools, apps, social media, and everything tech-related. Simple fixes. Smart tech. All in one place.